


Running an automatic block making machine takes more than switching it on and feeding mix into the mold. Block quality, waste, power consumption, production speed, and even the service life of machine parts depend heavily on how the machine is set up and how experienced the operator is.
In many plants, problems such as porous blocks, chipped corners, cracked products, jammed molds, or accelerated machine wear start with a few simple causes: an unsuitable mix, incorrectly set vibration, the wrong press pressure, or neglected daily servicing.
This guide explains in plain terms how to operate an automatic block making machine and what role machine setup, the electrical control panel, and especially the vibration setting play in the quality of the finished product.
How Does an Automatic Block Making Machine Work?
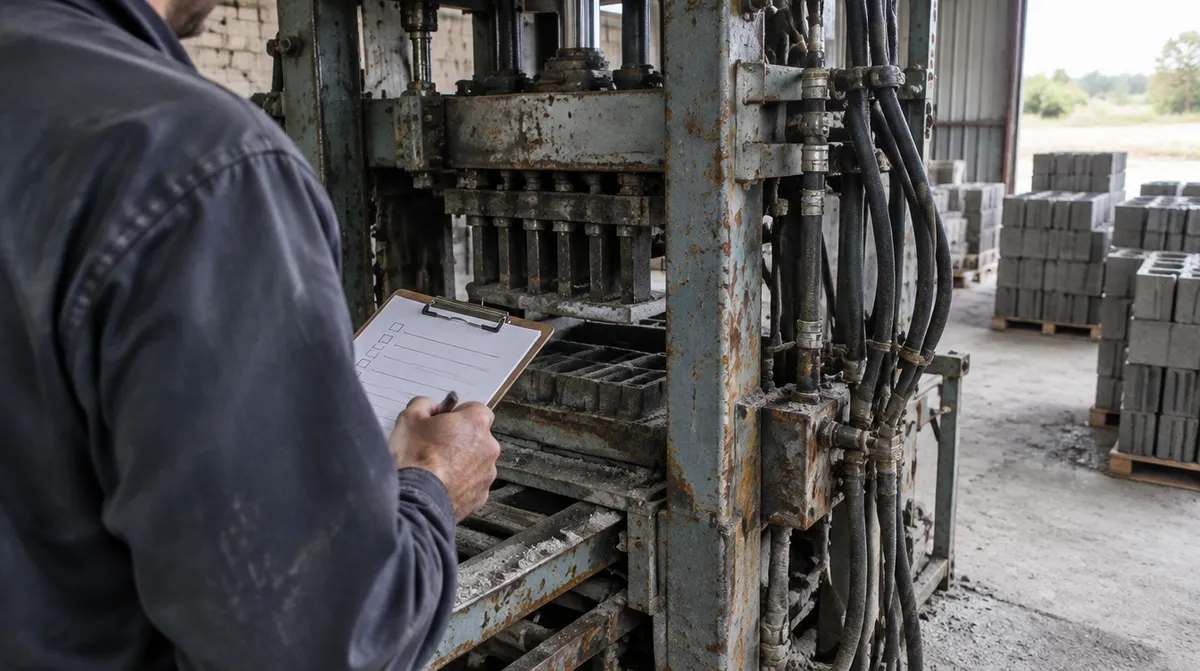
An automatic block making machine is used to produce concrete products such as blocks, curbstones, pavers, and similar items. If you are still choosing a machine, it is best to first learn about the types of block making machine and the differences between stationary, mobile, manual, and automatic models, and then come back to this section.
On block production machines, much of the process runs automatically or semi-automatically, and the operator mainly acts as the controller and supervisor of the process.
In a typical cycle, the machine goes through these steps:
- Receiving the mix in the machine’s bin or hopper
- Transferring the mix into the mold
- Applying vibration so the mix settles better
- Pressing the mix inside the mold
- Discharging the block from the mold
- Moving the product away for drying and curing
On automatic machines, coordination between the vibration system, hydraulics, mold, tamper head, and electrical control panel is critical. If any one of these parts does not work properly, the machine’s output will not be of consistent quality.
What to Check Before Starting an Automatic Block Making Machine
Before production starts, the operator should check a few simple but important items. This does not take long, but it can prevent production stoppages and poor-quality blocks.
Checklist Before Switching On the Machine
| Items to Check | Why It Matters |
| Incoming power and electrical control panel | Prevents faults, sudden power interruptions, or electrical damage |
| Hydraulic oil level | Maintains proper pressure and smooth cylinder operation |
| Mold and tamper head | Prevents chipped edges, jamming, or block deformation |
| Vibration motor | Confirms even vibration and no abnormal noise |
| Bolts and connections | Prevents parts from working loose under vibration |
| Mix quality | Prevents porosity, cracks, and production waste |
| Making a few test samples | Checks quality before mass production |
If the machine makes abnormal noise, the control panel shows a fault, the vibration seems abnormal, or the mold does not discharge properly, do not start the main production run until the problem has been investigated.
What Role Does the Mix Play in Block Quality?
One key point in operating an automatic block making machine is that block quality does not depend on the machine alone. Even the best machine will not deliver good output if it is fed an unsuitable mix.
The mix for a block making machine should normally be semi-dry, or damp. It should not be so dry that it fails to spread well in the mold, nor so wet that the block loses its shape after leaving the mold.
So before changing the vibration settings, make sure a standard cement block mix has been prepared, because poor moisture content and aggregate grading will reduce product quality even on the best machine.
What Problems Does an Unsuitable Mix Cause?
- If the mix is too dry, the block comes out porous, honeycombed, or chipped at the edges.
- If the mix is too wet, the block deforms after leaving the mold.
- If the mix is not uniform, block quality varies over the course of the day.
- If the aggregate grading is unsuitable, product density drops.
- If the mix moisture is not constant, the vibration setting will not give accurate results either.
For this reason, before changing the vibration or press pressure settings, the operator must make sure the mix is in good condition in terms of moisture, composition, and uniformity.
Steps for Operating an Automatic Block Making Machine
To run the machine correctly, the operator should carry out the production steps carefully and in order. Hasty changes to the settings increase waste.
1. Preparing the Mix
First, the mix must be prepared with the right proportions of aggregate, cement, and water. In plants with higher production capacity, suitable mix preparation equipment becomes even more important, because mix uniformity directly affects block quality.
2. Transferring the Mix to the Machine
The prepared mix enters the machine’s bin or hopper. At this stage, make sure material enters the machine evenly and the machine does not run short of material or face a sudden interruption in supply.
3. Filling the Mold
Once the mix has entered, the mold must fill completely and evenly. If one side of the mold is underfilled, the finished block will not be uniform in weight, density, or appearance.
4. Applying Vibration
Vibration helps the mix settle better in the mold, reduces the voids between particles, and gives the block better density. However, vibration must be set to suit the type of mix and product.
5. Pressing the Mix
Press pressure compacts the mix inside the mold. Too little pressure produces a weak block, and too much can put stress on the mold, the tamper head, or the product.
6. Discharging the Block from the Mold
At the end of the cycle, the block should leave the mold without sticking, crumbling, or deforming. If blocks are damaged during discharge, check several things: mix moisture, mold cleanliness, press pressure, vibration time, and discharge time.
What Does the Control Panel on a Block Making Machine Do?
The electrical control panel is the machine’s command center. Many of the machine’s main functions are managed through the panel or the machine’s control system.
On automatic machines, the control panel does more than turn the machine on and off. Depending on the machine model, the following can be controlled from the panel:
- Vibration time
- Press time
- Sequence of production steps
- Movement of hydraulic components
- Starting and stopping the vibration motor
- Emergency stop
- Product discharge time
- Running the automatic cycle
The operator should know how to use the panel’s main controls, but should not attempt to change sensitive settings, work on the wiring, or repair the panel without specialist training. Incorrect changes to the control panel can stop the machine, damage parts, or create safety hazards.
On larger production lines, the quality of a block making machine’s work does not depend on the control panel settings alone. A uniform supply of mix also matters a great deal. That is why, in plants and factories with higher production capacity, equipment such as a concrete batching plant can help achieve better control over the proportions of aggregate, cement, and water.
What Does Setting Up a Block Making Machine Involve?
Setting up a block making machine is not a single simple adjustment. Several parts must work in harmony for the final product to reach the right quality.
The Most Important Machine Settings
| Setting | Effect on Production |
| Vibration time | Affects density and whether the block comes out porous |
| Vibration intensity | Affects how the mix settles and how fast the machine wears |
| Press pressure | Affects the block’s strength and final shape |
| Discharge time | Affects whether the block leaves the mold intact |
| Mix moisture content | Affects the block’s shape retention and early strength |
| Mold cleanliness | Affects product appearance and discharge |
The best approach is for the operator to change only one setting at a time and then check the result. If several settings change at once, it becomes hard to identify the cause of a problem.
For example, if the finished block is porous or chipped, do not immediately increase the vibration time. The problem may lie in the mix moisture, incomplete mold filling, press pressure, or even the aggregate grading. In a case like this, checking step by step helps pinpoint the real cause of the quality loss.
Why Is the Vibration Setting on a Block Making Machine Important?
Vibration is one of the most important functions of a block making machine. Its job is to help the mix pack better into the mold, reduce voids, and give the block better density.
The important point, however, is that more vibration does not always mean better quality. The vibration setting must be matched to the type of mix, the mold, the press pressure, and the quality of the output.
If vibration is too low, the block may:
- Come out porous.
- Lack sufficient strength.
- Crack or break after drying.
If vibration is excessive, then:
- Power consumption may rise.
- The vibration motor may be put under strain.
- Bolts and connections may work loose.
- The mold and frame may wear faster.
- Materials inside the mold may segregate.
- The product’s appearance may suffer.
So the goal of setting vibration on a block making machine is not to run the machine at maximum shaking. The goal is to produce uniform, quality blocks with the least unnecessary stress.
How to Set the Vibration on a Block Making Machine
To set the vibration on a block making machine, the operator should proceed step by step. The setting should be based on the type of mix, the type of product, the mold, and the quality of the output.
Step 1: Check the Mix Quality
Before changing the vibration, make sure the mix has been prepared correctly. If the mix is too dry or too wet, changing the vibration will not fully solve the problem.
An overly dry mix prevents material from settling well in the mold, leaving the block porous or honeycombed. An overly wet mix, on the other hand, can cause the block to deform after it leaves the mold.
Step 2: Start with a Medium Setting
When starting production, keep vibration time and intensity neither very low nor very high. A medium setting makes it easier for the operator to see what change the machine needs.
Step 3: Make a Few Test Blocks
After starting up, make a few sample blocks and check their appearance, density, corners, and how they leave the mold.
At this stage, the operator should also look at weight consistency, corner shape, product surface condition, and how much the block sticks to the mold.
Step 4: Change the Vibration Time Gradually
If the vibration time needs changing, do it in stages. A large, sudden change makes it hard to identify the cause of a problem.
After each change, make a few new samples and compare the result with the previous ones. This simple method prevents you from producing a large number of scrap blocks.
Step 5: Judge the Result by the Product
The correct vibration setting should be judged by the machine’s output, not just by the sound of the machine or the intensity of the shaking. If the block has a good appearance and acceptable density and leaves the mold intact, the settings are close to where they should be.
How Much Vibration Suits Each Type of Mix?
The exact amount of vibration can differ from one machine and mold to another, but the table below offers operators general guidance. These values must be adjusted through practical testing and according to the quality of the output.
| Mix or Product Type | Recommended Vibration | Key Note |
| Lightweight or pumice mix | Low to medium | High vibration may damage the lightweight aggregate structure |
| Standard sand mix | Medium | A balanced setting usually gives good output |
| Thicker or heavier products | Medium to high | Needs greater density, but the machine should not be under abnormal stress. |
| Mix with admixtures | Low to medium | Because it flows more easily, high vibration can cause the cement paste to separate from the mix. |
This table does not replace practical testing. The best setting is reached when the operator makes several samples and checks the block quality.
If you are having trouble with cracking, crumbling, or loss of strength when producing lightweight or pumice blocks, do not blame the vibration alone. Our article on why pumice blocks crumble also examines other important factors such as mix quality, density, moisture, and product curing.
Adjusting the Vibration Motor’s Eccentric Weights: Important but Specialized
On many block making machines, the vibration system runs on vibration motors with eccentric weights. In these motors, the weights sit on both ends of the motor shaft, and their rotation generates the vibration.
Changing the angle of the eccentric weights increases or decreases the vibration’s impact force. This must be done carefully, however, because incorrect adjustment of the weights can cause unbalanced vibration, bearing failure, stress on the frame, or even a burned-out motor.
Key Points When Adjusting the Vibration Motor’s Eccentric Weights
- Before doing anything, completely disconnect the machine’s power.
- Motor covers should only be opened by someone familiar with the machine.
- The weights on both ends of the motor must be set perfectly symmetrically.
- One-sided or asymmetrical adjustment of the weights is dangerous.
- After adjustment, the bolts must be tightened firmly.
- If the machine has two vibration motors, their direction of rotation must be set correctly.
- This work is best done by a service technician or another technically trained person.
For an ordinary operator, knowing the signs of incorrectly set vibration and calling a service technician at the right time matters more than tampering with the eccentric weights.
Which Vibration Setting Is Most Economical?
The most economical vibration setting is not the highest intensity or the longest vibration time. An economical setting means the machine produces acceptable, strong, uniform blocks with the least unnecessary stress.
Block production carries two kinds of hidden cost: the cost of too little vibration and the cost of too much.
The Cost of Too Little Vibration
When vibration falls below the right level, product quality falls short. As a result, the plant may face these problems:
- Increased waste
- Returned products
- Reduced block strength
- Extra materials used to make replacement products
- Loss of customer trust
The Cost of Too Much Vibration
With excessive vibration, it may seem at first that the product is improving, but in practice other costs can arise:
- Higher power consumption
- Vibration motor wear
- Bearing failures
- Loosened bolts
- Stress on the mold and frame
- Greater need for servicing and repairs
So the best setting is a point of balance: the block is of good quality, but the machine is not working under high stress for no reason.
Signs of Incorrectly Set Vibration on a Block Making Machine
If the vibration is not set correctly, the signs usually show up in the product or in the machine itself.
Signs of Too Little Vibration
- The block is porous or honeycombed.
- Corners do not form completely.
- The block surface is uneven.
- The block lacks good early strength.
- The product cracks after drying or breaks easily.
Signs of Too Much Vibration
- The machine vibrates abnormally.
- The vibration motor sounds abnormal.
- Bolts and connections keep working loose.
- The product surface shows segregation or bleeding.
- Power consumption and machine wear go up.
Keep in mind, though, that these signs are not always related to vibration alone. Sometimes the problem lies in the mix, the mold, the press pressure, or the control panel settings.
If your main problem is lightweight blocks crumbling or cracking after drying, check other factors in addition to vibration, such as mix moisture, pumice type, cement content, and how the product is stored. For this topic, our guide on why pumice blocks crumble is a good companion to this section.
Common Operator Mistakes When Setting Up a Block Making Machine
In many plants, simple operator errors increase waste and machine wear. Some common mistakes are:
- Increasing vibration to compensate for an unsuitable mix
- Changing several different settings at the same time
- Starting mass production without testing the first few samples
- Neglecting mold cleanliness
- Ignoring abnormal noise from the vibration motor
- Letting an unqualified person tamper with the control panel
- Ignoring loose bolts and connections
- Greasing moving parts excessively or irregularly
Sometimes a simple adjustment or a short service can prevent a bigger breakdown. On the other hand, continuing to run on the wrong settings can both raise production waste and increase machine repair costs.
Maintaining the Vibration System to Reduce Repair Costs
Because of constant shaking, the vibration system endures heavy stress. Proper maintenance therefore plays an important part in reducing repair costs.
Items to Check Regularly:
| Vibration System Components | Recommended Action |
| Vibration motor bolts | Check and tighten regularly |
| Motor power cables | Check for tears, overheating, or damaged insulation |
| Vibration motor sound | Listen for any abnormal noise |
| Bearings | Lubricate on schedule, not excessively |
| Vibration dampers and springs | Check for cracks, tears, or uneven settling |
| Motor mounting point | Make sure the mounts are secure |
One common mistake is the operator’s belief that more grease is always better. In fact, overgreasing can make bearings run hot and fail sooner. The machine should be serviced on schedule and with the right amount of grease.
When Should You Call a Service Technician?
Some tasks, such as cleaning the mold, checking production samples, or visually inspecting the machine, are done by the operator. Other problems, however, need specialist inspection.
Call a service technician in these cases:
- The control panel shows a recurring fault.
- The machine stops suddenly.
- The vibration motor makes abnormal noise.
- The machine’s vibration has become unbalanced.
- The vibration motor bolts keep working loose.
- Block quality does not improve when settings are changed.
- The hydraulic system is losing pressure.
- The mold does not fill or discharge properly.
- The vibration motor’s eccentric weights need adjusting.
Continuing to run a machine with a serious problem can multiply the repair bill several times over.
Conclusion
Learning to operate an automatic block making machine is essential for any plant seeking consistent, high-quality, economical production. An automatic machine performs at its best when the operator looks beyond production speed and also keeps an eye on mix quality, machine setup, the control panel, press pressure, and the vibration system.
Setting the vibration on a block making machine is one of the most important parts of this process. Too little vibration produces porous, weak blocks, and too much raises power consumption, wear, and stress on the machine. The best setting is one where the block has proper density and appearance, but the machine is not put under stress for no reason.
If you plan to set up or upgrade a block, curbstone, or concrete paver plant, choosing the right machine and training operators properly can save you many costs later on. Tarahan Machinery, a direct manufacturer of concrete product machinery in Tabriz, Iran, provides consultation, on-site installation and commissioning, and training in block making machine operation. To choose the right machine for your production capacity and plant conditions, contact Tarahan Machinery’s specialists for a free consultation.









Submit Comment: